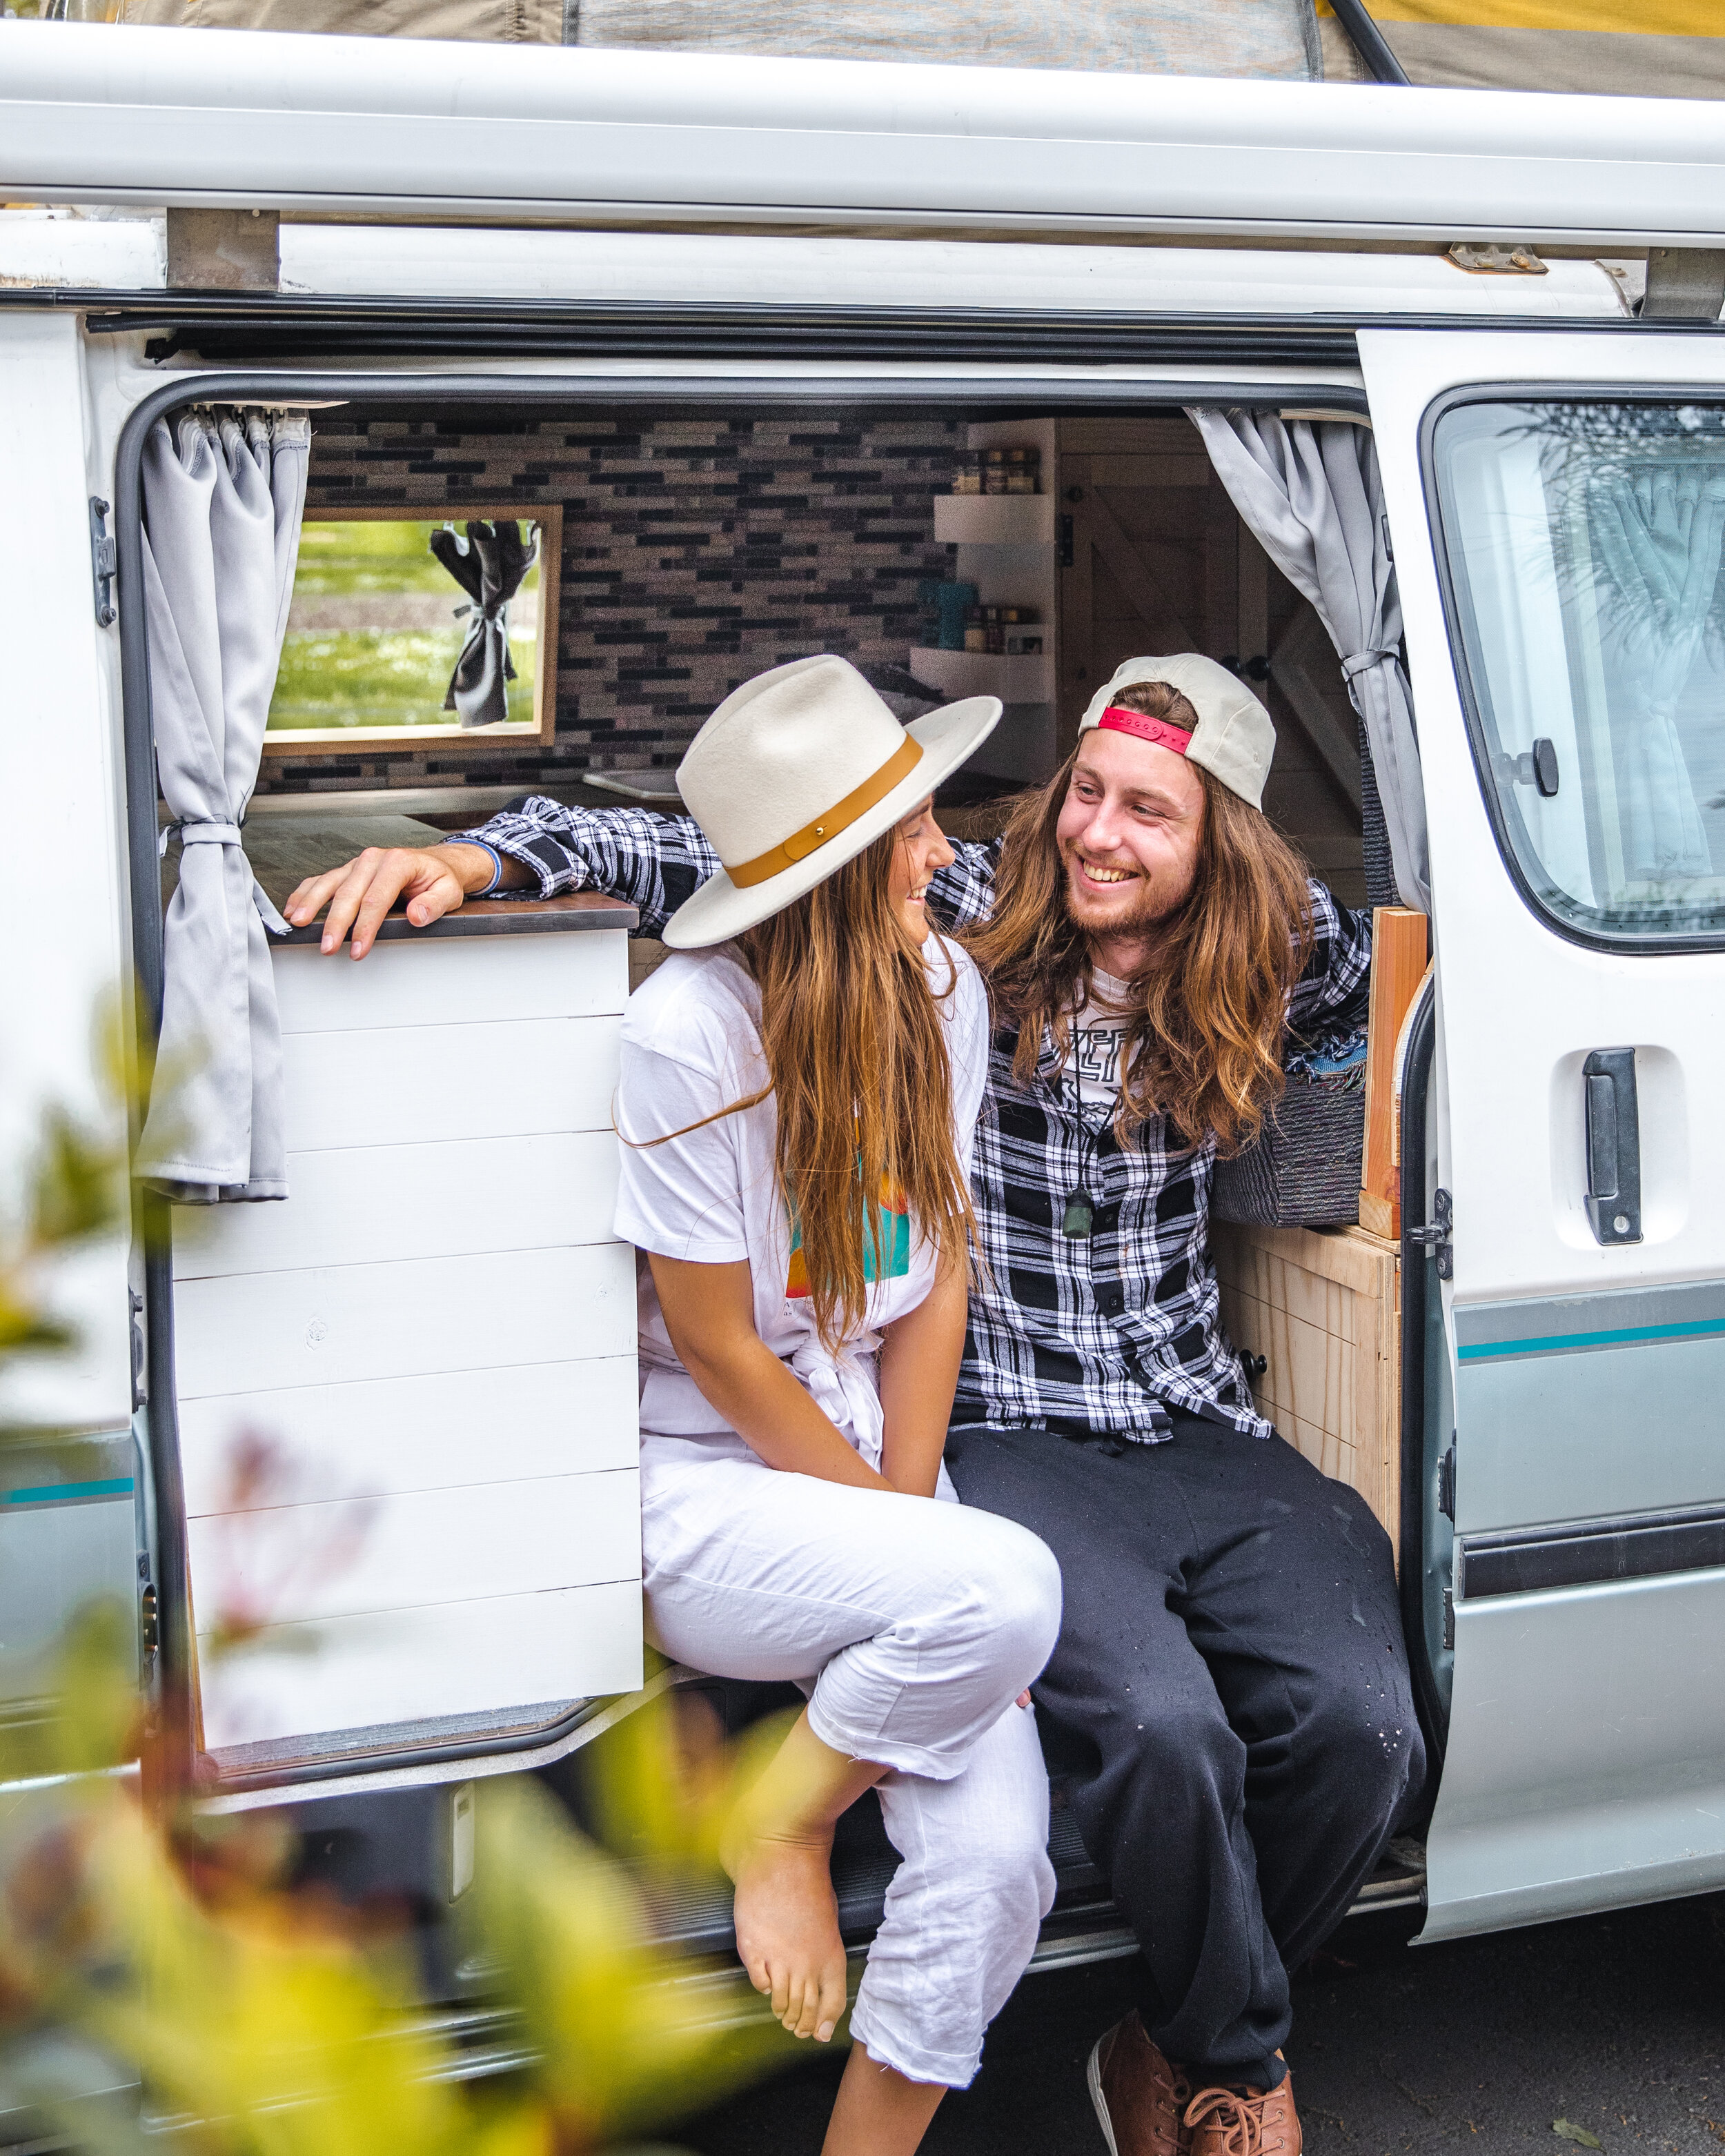
Larry
Quick Facts.
THE VEHICLE
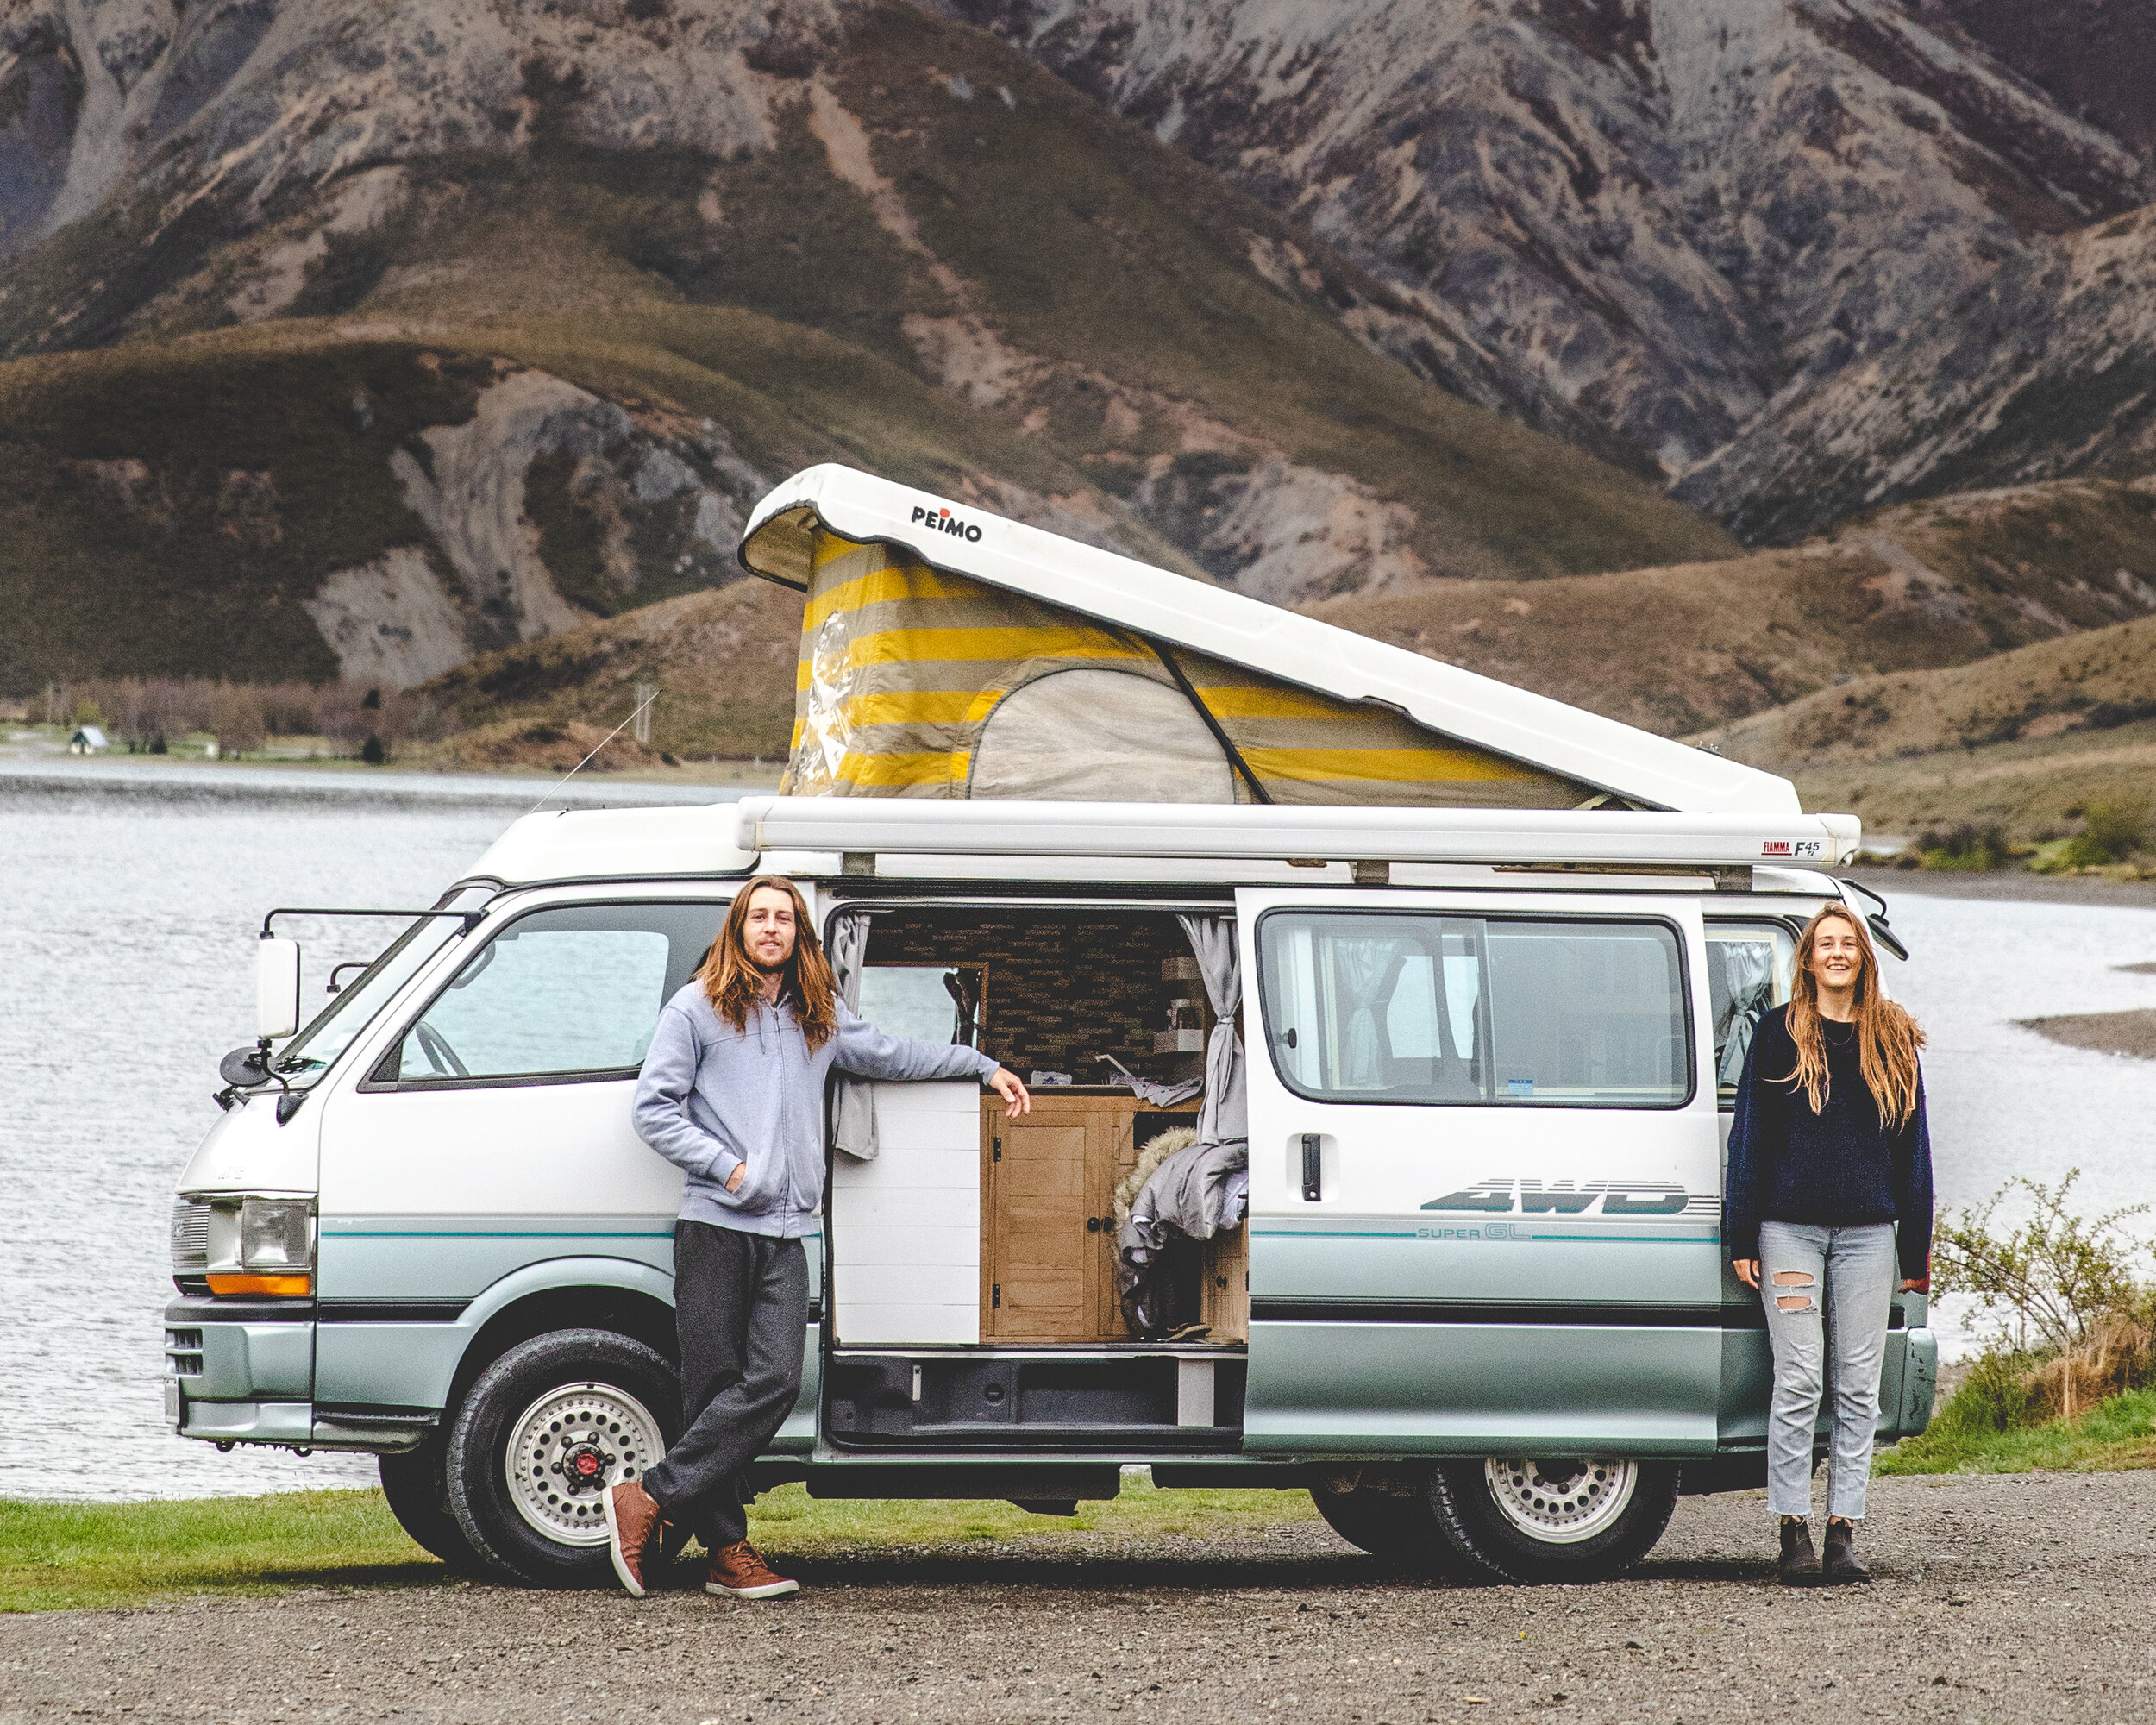
1992 Toyota Hiace Super GL 4WD
3L 2779cc Diesel Engine
4spd Automatic Gearbox
Approx. 4.7m x 1.7m
THE LAYOUT
L shaped kitchen
L shaped couch/bed
Full height cabinets
Rear ‘garage’ area
THE FEATURES
Pop top roof incl. sleeping for 2
100w solar panel
120ah AGM Deep Cycle battery
Dual heating in rear
Record player & vinyl storage
22L fridge
Awning
25L fresh and grey water tanks
The Beginning.
We’d be lying if we said we didn’t start looking for vans in New Zealand as soon as we decided we were moving home. The scary thing was we struggled to find anything suitable after scouring all of the online trading sites. We landed back in NZ after wrapping up our life in AUS and selling The Jah Bus (more info in our About Us & Jah Bus write up) with the idea of finding a van, building it out, and heading off into the sunset. . . at least until the savings ran out. With no luck in the month we’d been searching, we were starting to look at lowering our expectations and settling for a van that would work in the meantime. Until ol’ Goosey took a wrong turn . . . .
There he was. Sitting in the back of an unassuming car yard we’d driven past almost daily back when we lived in Christchurch. As the only van in a sea of small hatchbacks and hybrids, he almost called out to us. We hit the skids and pulled over for a closer look. It was everything we’d been looking for in a van - 4wd, strong diesel engine, clean LWB body, room to stand inside, and most importantly looked bloody beautiful! (we get it if you don’t understand our obsession with old 90’s vans haha). We called the next day when they were open only to be told it was in the process of being sold. . . we were heartbroken. We left our details not expecting anything to happen, but a phone call a few days later picked us right back up again! Not 100% sure what happened with the old buyer but we didn’t care, the van was ours! Within a few days we’d packed up a few basic things and headed off on a small trip to test out the existing camper setup in the van. Safe to say things needed to changed for full time living. . . .Queue conversion #2 for team G&E!
PS. If you aren’t aware of the full story with Larry, keep reading to find out why we don’t have him anymore 💀💀💀

Not a bad spot for our first camping mission back in NZ! It’s still one of the best free camps we’ve found to date.
The Factory Fitout.
When buying a pre converted vehicle, we always recommend spending a few nights away in it before jumping in and making it your own. It gives you a great idea of what works and what doesn’t, as well as giving you a feel for what it’s like functioning in the small space. We realised very quickly that there was no were near enough storage for our needs. There was also no cooker, fridge and only a very basic electrical system - not ideal for full time living. Even ignoring all the issues with the functionality, the interior was just downright ugly and would be difficult to live with for too long. We were already dreaming of our ultimate layout night one in the van!

Here’s the original interior in all it’s plastic-ey peppermint glory! We threw in a wooden desk to house one of the water jugs and give us some more bench space. She’s pretty basic compared to the 40 foot bus we’d come from!
The Idea & Floor plan.
This van was to be our fulltime home for at least a year. We knew from day one that we would keep this vehicle forever and wanted to do things properly with it. The base vehicle was very capable, clean, well maintained, and we needed to build an interior to match. As with any home, we needed a comfortable place to prepare and cook meals, plenty of storage to keep our clothes and adventure gear, a comfortable area to chill and of course, a bed to snuggle up in at night (and most days!). Figuring out how to squeeze all of this into less than 5sqm ain’t an easy task!
The original fitout gave us the inspo for how we’d like the new layout to look. We basically recreated it and improved on the storage everywhere we could. We shortened the counter space to make room for more full height cupboards at the rear of the van, but added a counter behind the front seats to give that vital bench space back, as well as storage underneath. Instead of rebuilding a straight couch along the opposite wall, we chose to add an extra ‘leg’ to make it an L shape. This gave us more room to sit inside the van, but also gave us a decent sized ‘garage’ area to store deck chairs etc. at the back of the van. With this layout we managed to fit in a portable toilet, 2 x 25L water jugs, a 22L fridge, a 9kg LPG bottle & cooker, camping & hiking gear, bedding, food, pots/pans/utensils, daily clothes. That’s a hell of a lot of stuff when you really think about it . . . and we’re not quite finished yet! The finishing touch and what made this van truly unique, was the addition of the record player and part of our vinyl collection. Hey it’s our home right?! Why not make room for the things that are important to us!!

A look at where things went in the van. We managed to cram in a whole lot of stuff! Although . . . having the bed slightly wider would have made it comfier for Goose.
Build Prep.
We wanted to go back to a good empty space to start the build. It was relatively straight forward to unscrew and remove the existing interior units. We put these up on for sale and wasn’t long until they were off our hands and we’d made a bit of cash to put into the build (a handy tip if you’re wanting to build your camper but don’t quite have the skills to create it yourself. Keep an eye out for wrecked or recycled campers!). Thankfully that was basically it for the ‘gutting’ stage! We left the grey carpet & timber flooring and the factory interior walls. With the ceiling being part of the fiberglass pop top roof, there was nothing to remove there either. The van was now empty and we were ready to start the build.

The blank slate! We left the existing steel frame and seatbelts to build the couch off.
Walls & Framing.
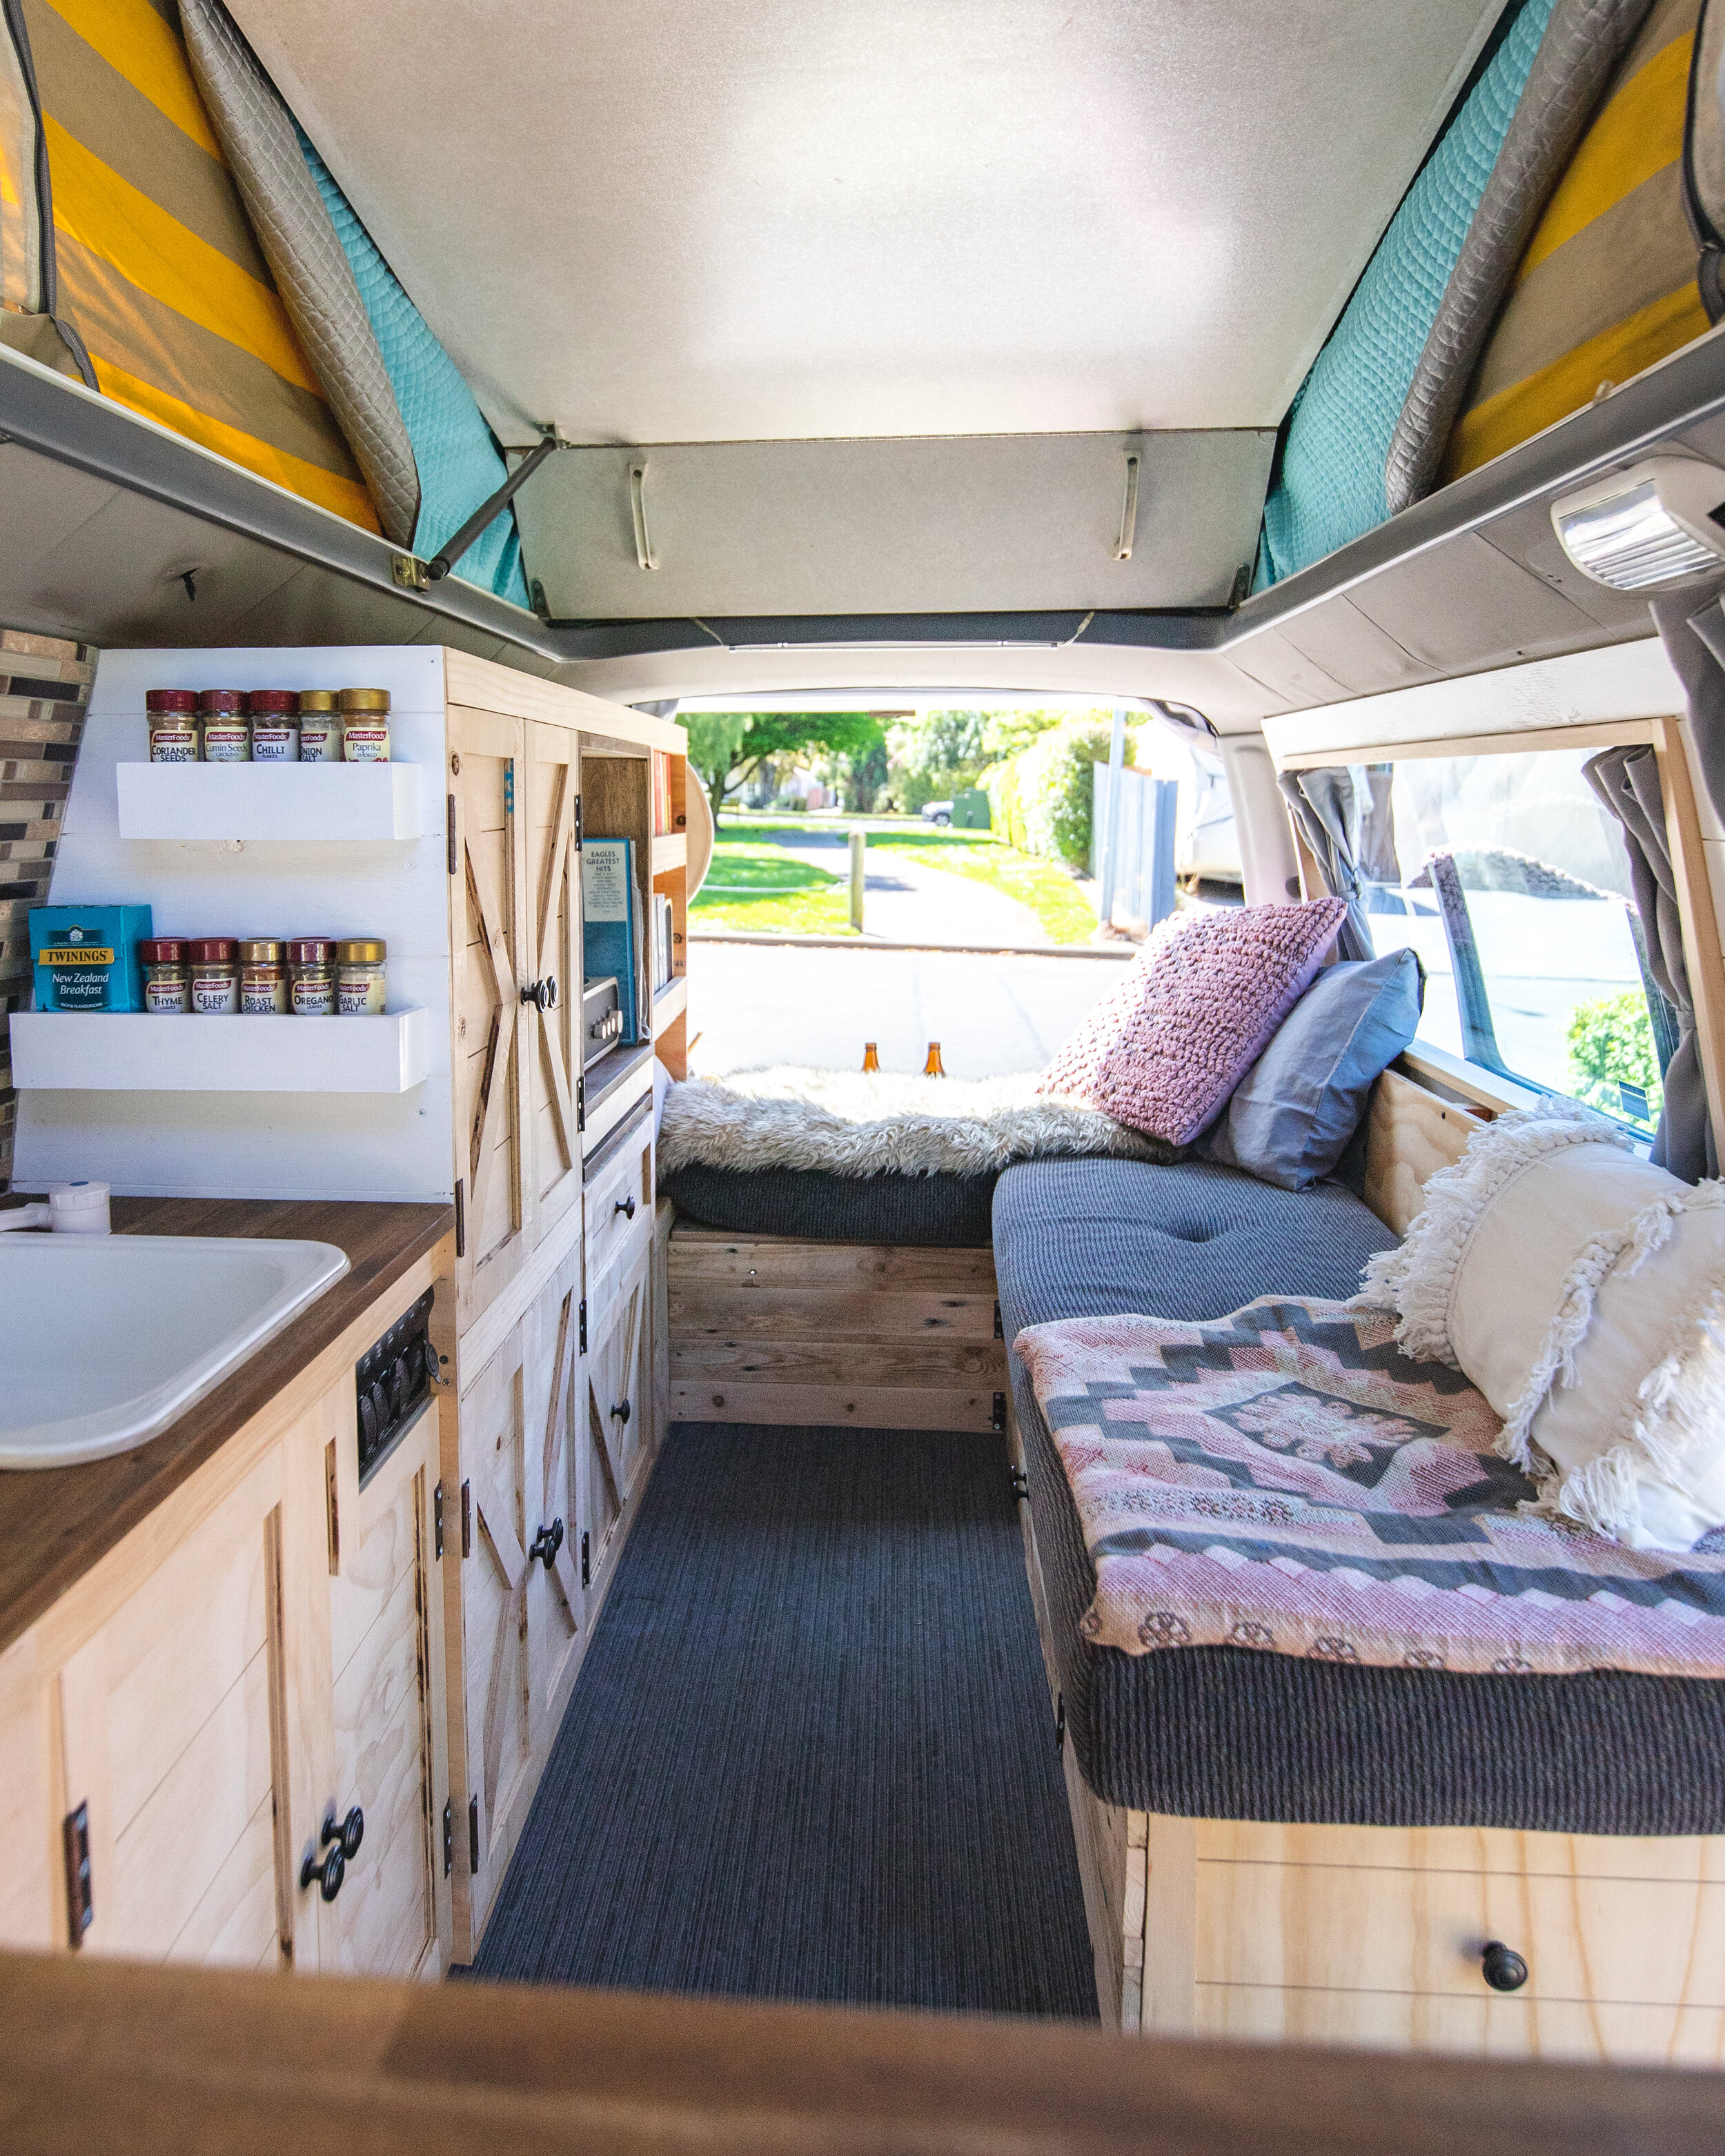
Beginning the build we lined the walls with ply (cut to shape, sanded & painted white on the rear) and also created a wall to divide the cabin from the rear living space. *HANDY TIP* **When building the wall behind the drivers seat, make sure you still have full access to all the engine and battery compartments. Test where things will hit when the engine cover is lifted and cut to clear as required**. The walls were screwed into the steel frame of the van, making sure there wasn’t any essential wires hiding behind. We then began framing the basic layout of the shelving area as well as boxing in the area where the heater units would go - you’ll notice this behind the drivers seat. More details on the heating coming up. Next was making the frame up for the kitchen benches. This was done with 40mm x 18mm pine simply screwed and glued together. We also used the pine to frame the shelving inside the cupboard and the bookshelf. To frame the couch/bed we used thicker timber for strength, attaching it to the existing steel frame in the van.

Starting to see the interior coming to life. We cut holes in the wall to still be able to open the windows and to let in a little light.
The Kitchen.
Once we had framed the basic L shape of the kitchen we needed to mount the bench top, divide it into sections and make cupboard doors and draws. The bench/counter top was a basic premade shelf from the local hardware store. We had to make a hinged cutout in the corner behind the drivers seat to allow access to the fridge underneath (hence the boxing of the heater components to make a solid platform). It was quite tricky to line it all up nicely but is doable when you take the time. Using more 40mm x 18mm pine, we divided off sections to fit (barely) the things we wanted to store and lined it with ply. We then divided off the top part of these sections to create the drawer holes. We kept the drawers super simple and avoided the need for pesky drawer slides. A simple base as a runner and a box made tight to fit the hole, and a basic drawer was done! Next up was making the cupboard doors and drawer faces - if you’ve done this before you’d know it suuucks! We started with a ply baseplate and cut strips of the same ply for the edging on the faces. Last step for the kitchen was to cut a hole in the bench top and mount the sink and faucet we kept from the old set up. This is always nerve racking but is pretty straightforward. Measure twice cut once!

The end result of the kitchen - doesn’t look too shabby if we do say so ourselves! We left the wood natural and untreated as we liked the look, but it did fade and stain over time.
The Plumbing.
While we’re up front in the kitchen, it seems like the best time to talk about the plumbing system in Larry. This was a cheap and basic setup that worked quite well. We started with 2x 25L water jugs (the minimum size required for self containment) for the fresh and grey/dirty water. The fresh jug had a small submersible pump inside that sucked water out of the jug and pushed it up to the faucet - this was wired up to a switch on our switch panel. A simple tube twisted to create a ‘P’ trap from the bottom of the sink then returned the dirty water to the grey water jug. Simple! Filling and emptying the jugs wasn’t that simple though. They had to be disconnected and dragged out of the van to be emptied and filled. An upgrade to be able to fill an empty the tanks without removing them was on the cards in the future.

We’re kicking ourselves because we don’t have photos for a lot of the details! Guess this amazing work of art will have to do 😂😂
The Cupboards.
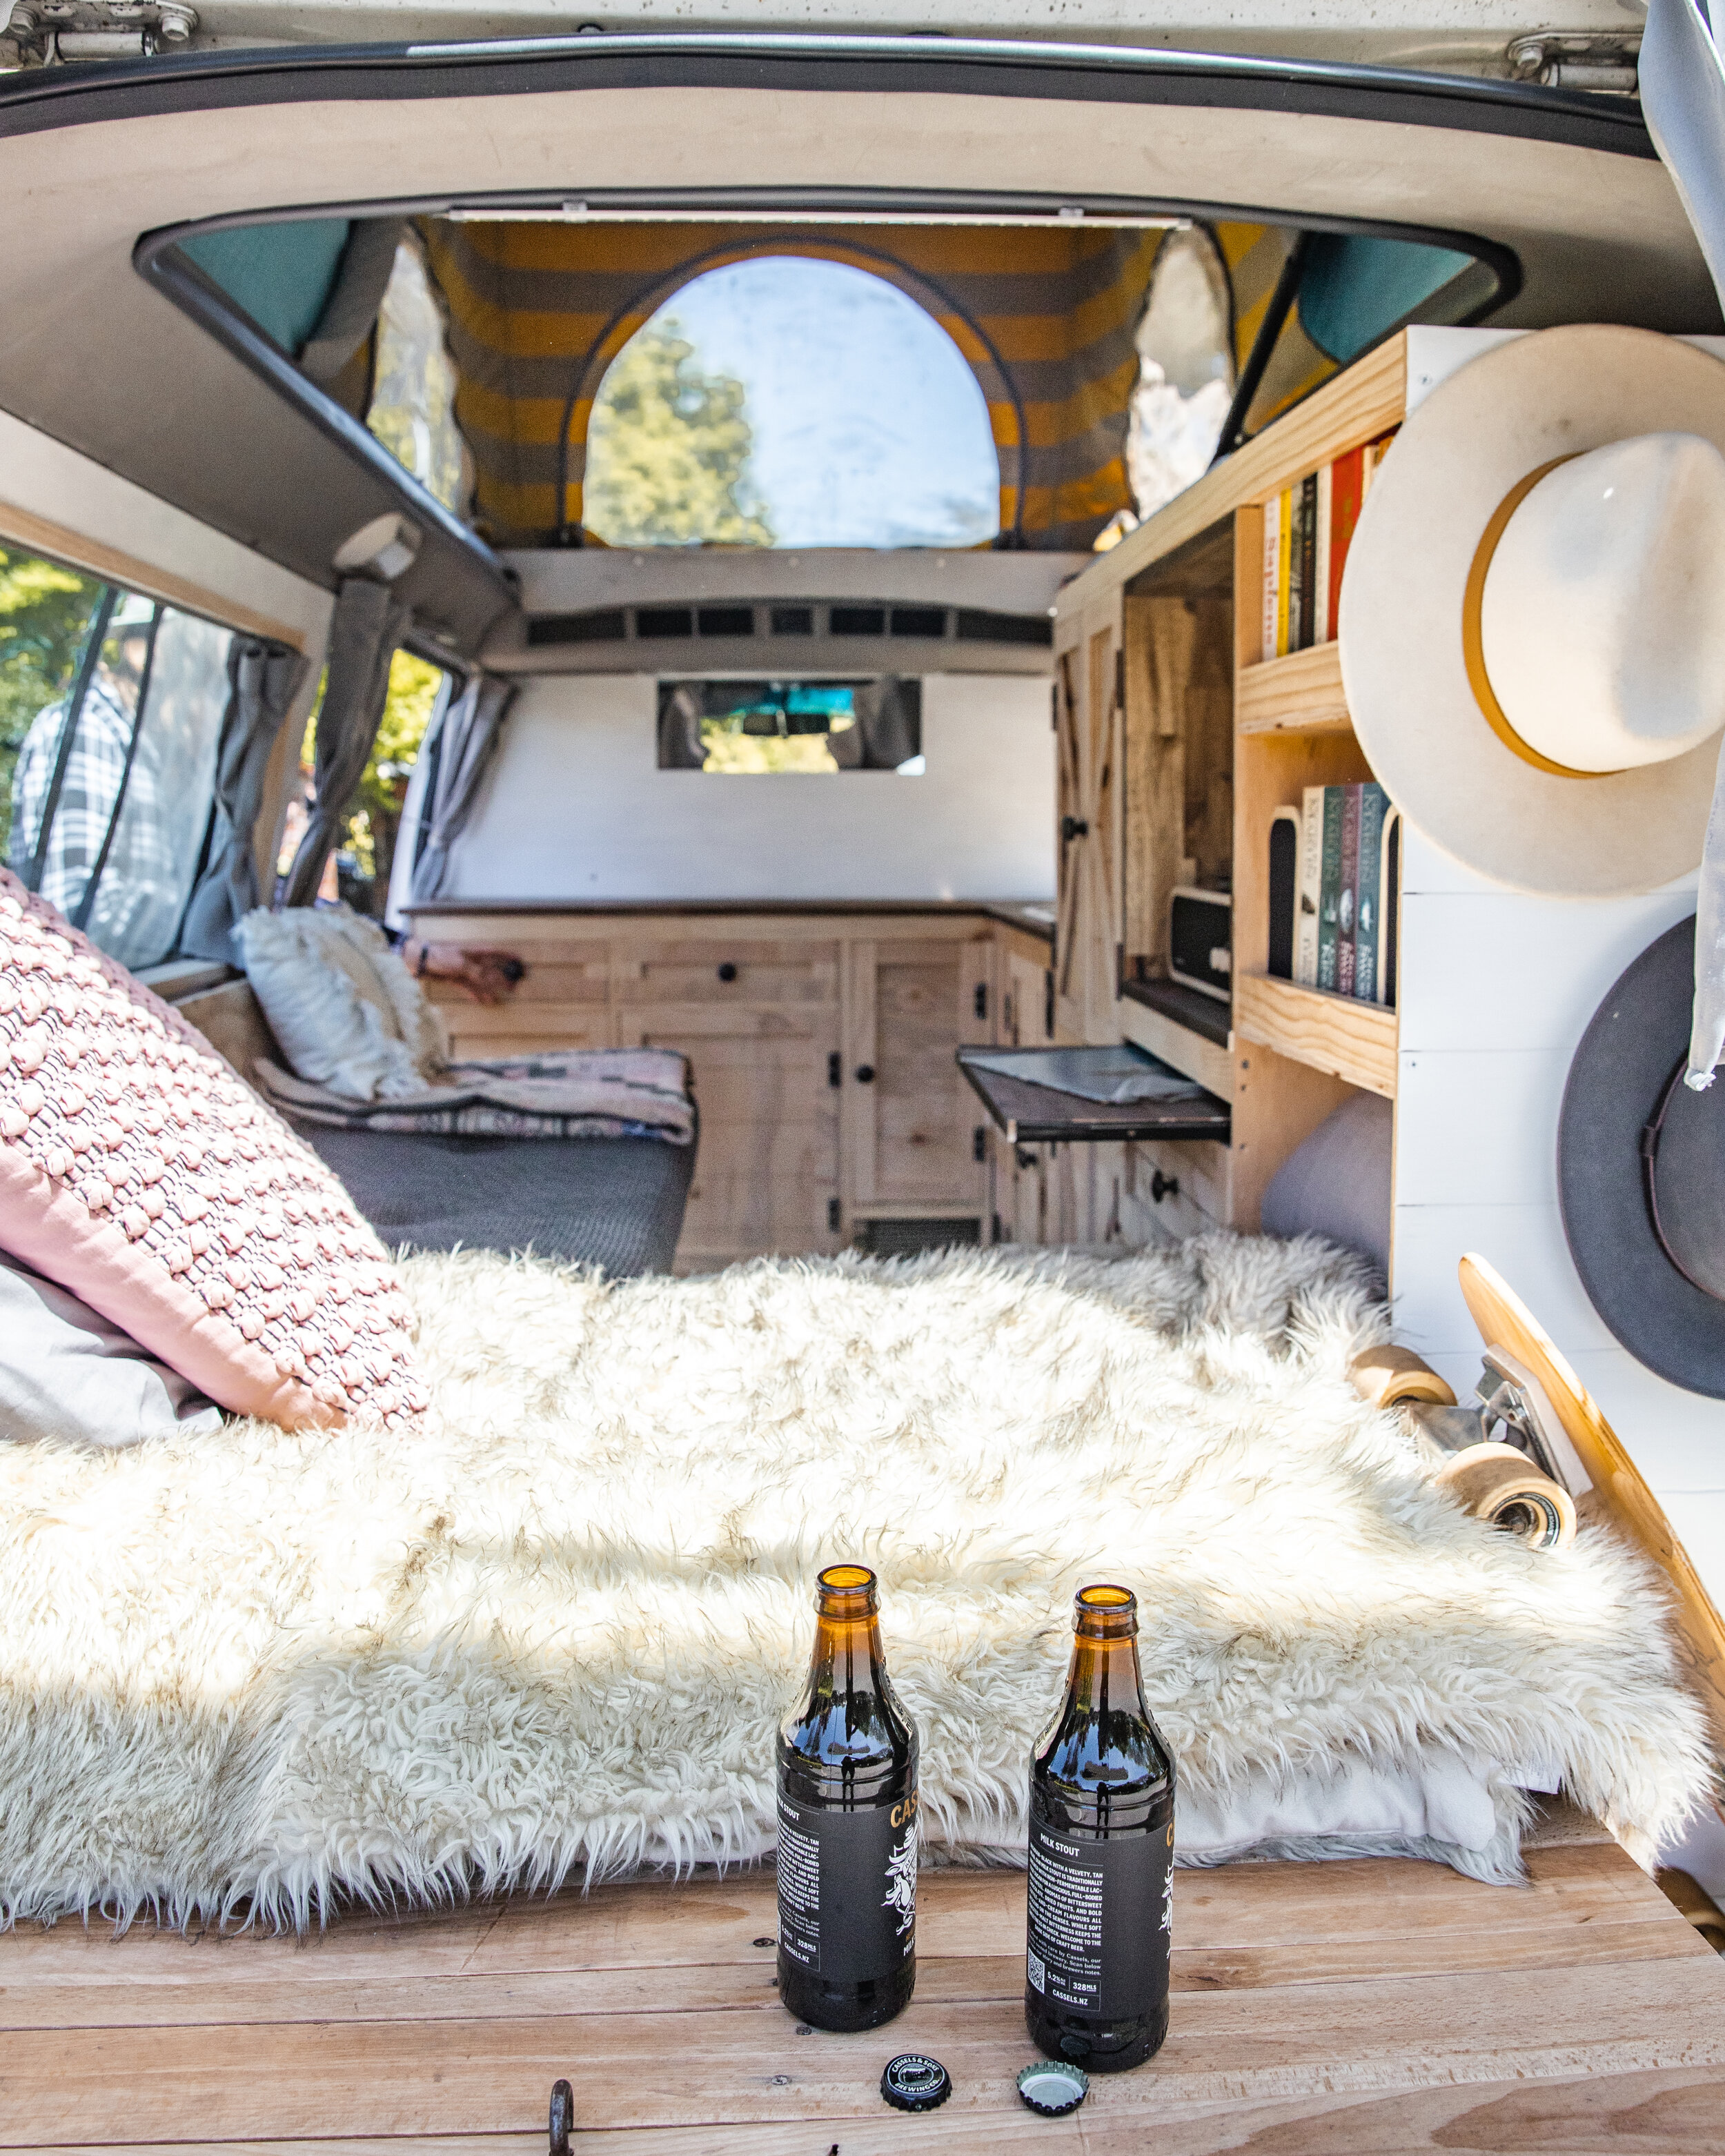
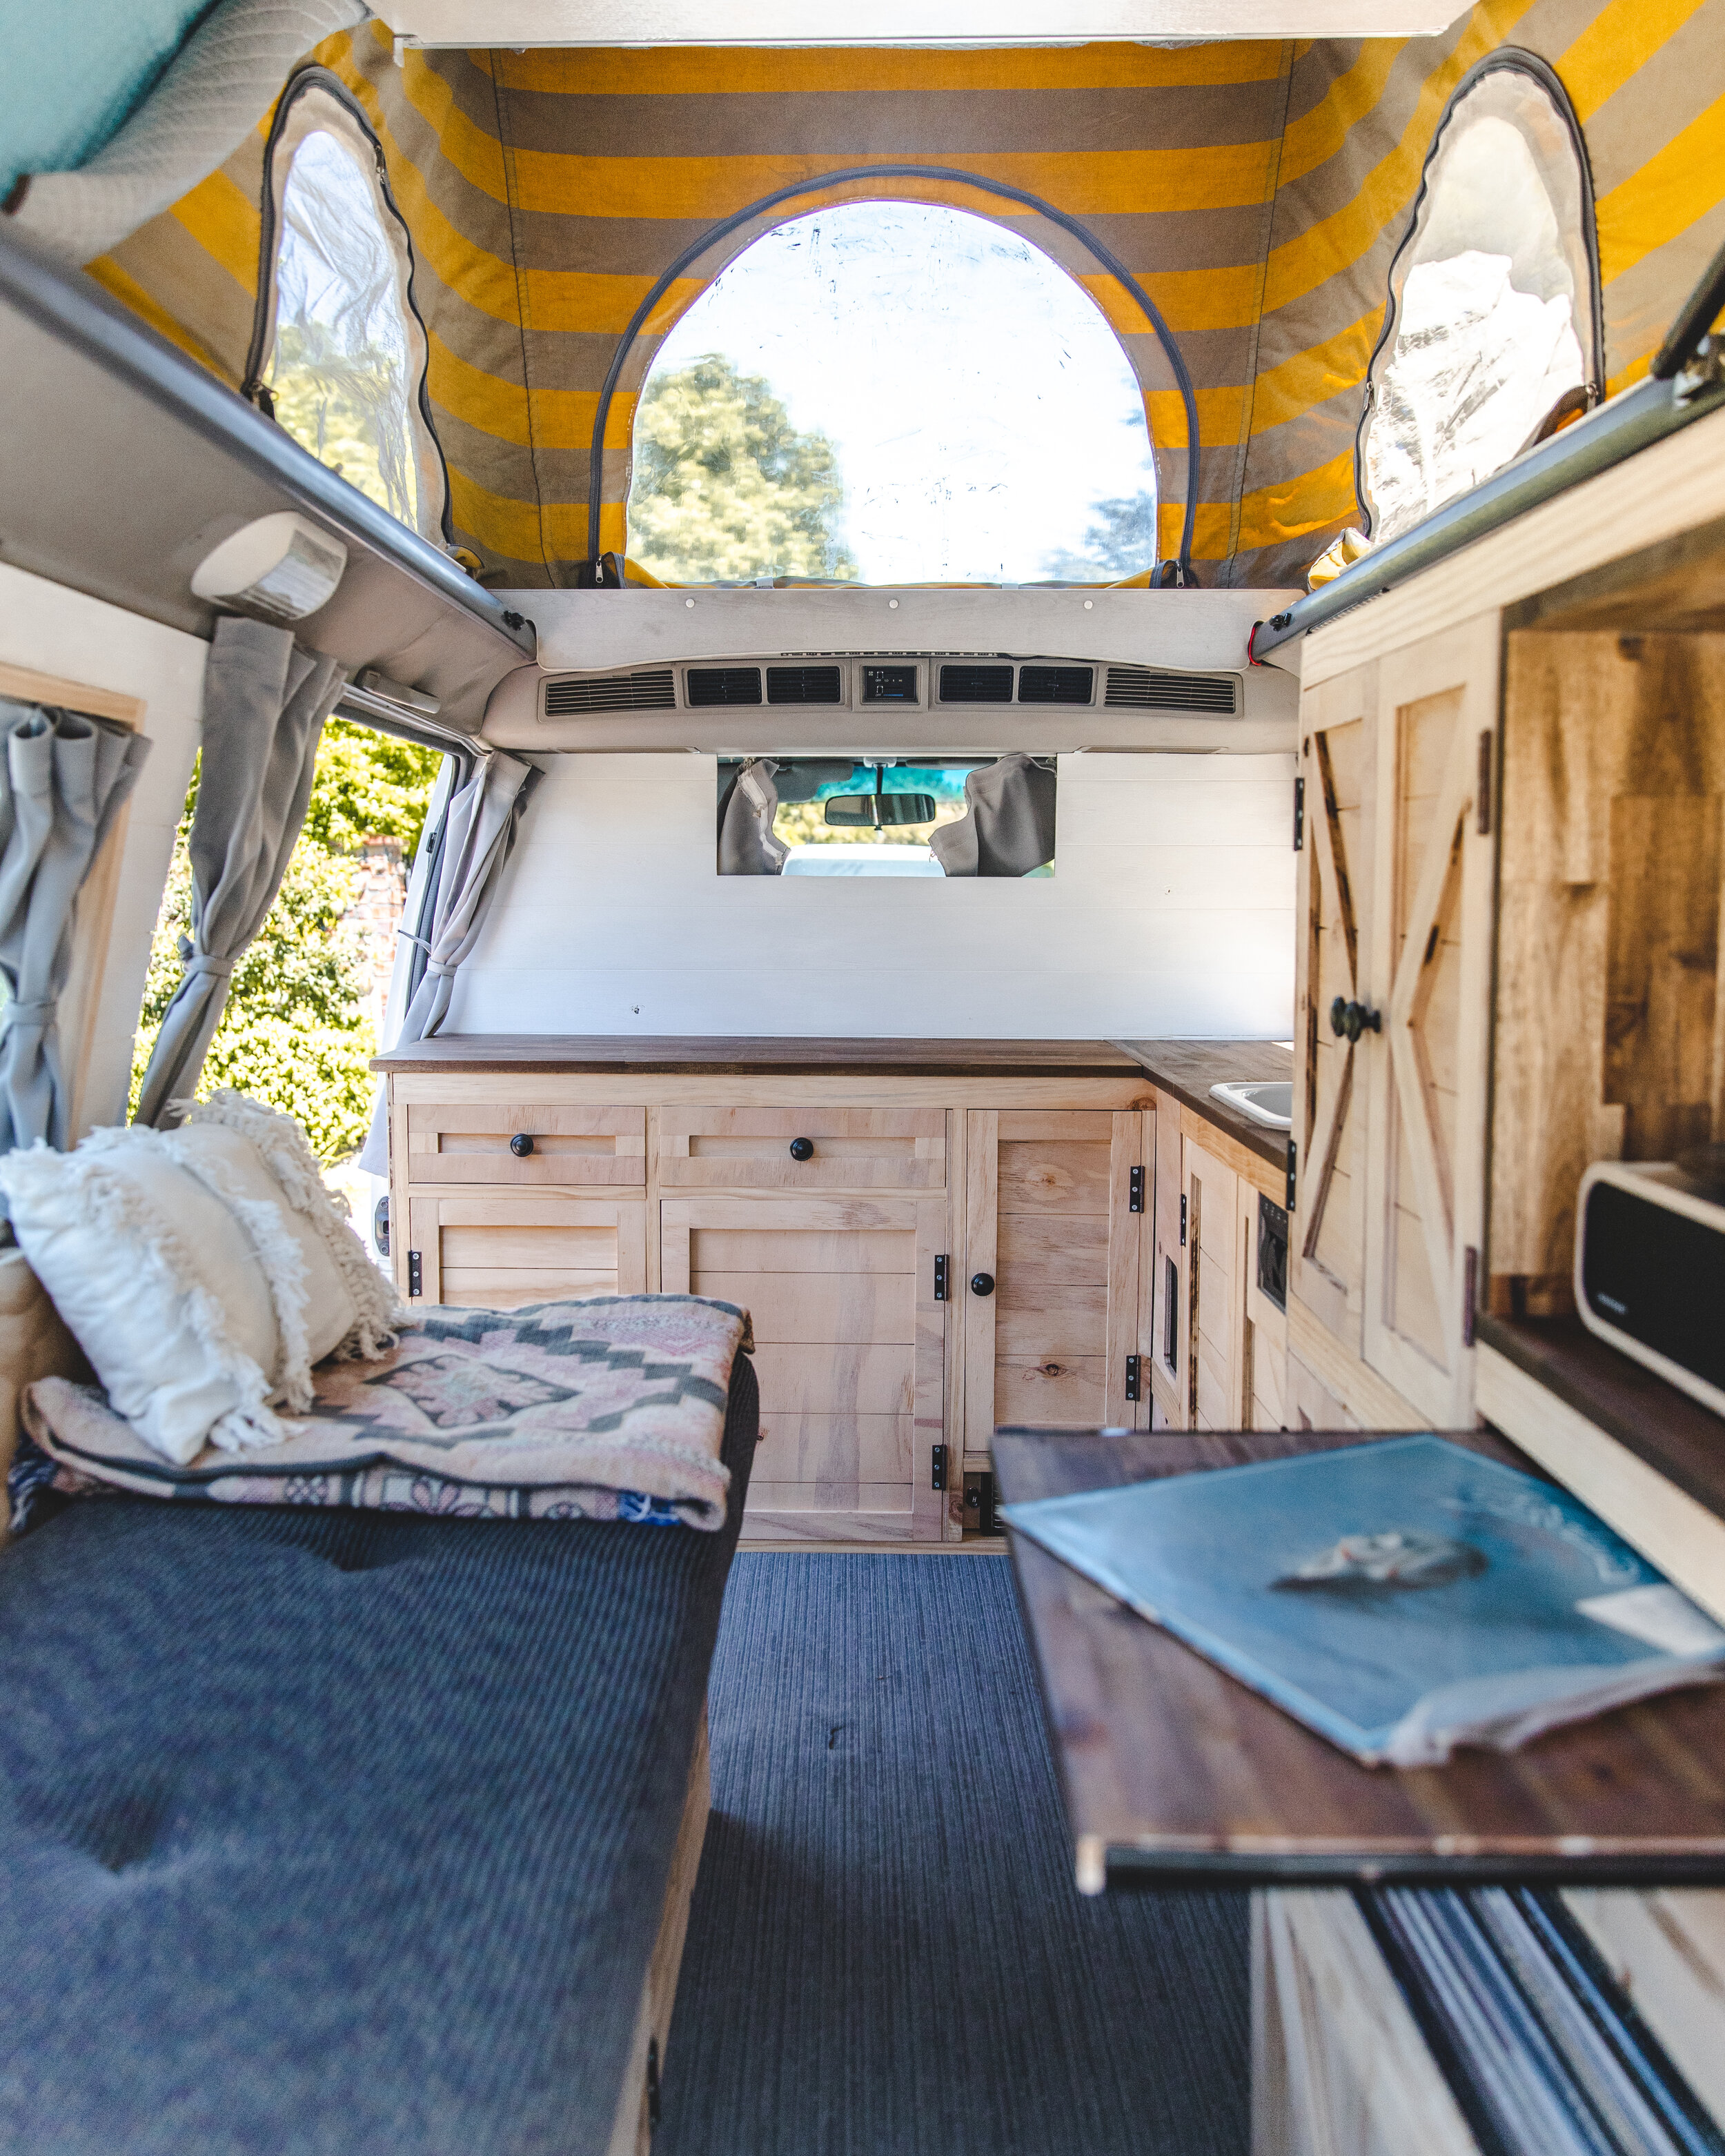
With the basic framing of the cupboard unit already done, we jumped in and finished adding supports and dividers for the separate sections. In essence we divided the whole unit into 3 equal sections horizontally, and then cut them in half vertically. This gave us a top half for things we wanted to have access to all the time, and a bottom half where we stored things we’d occasionally need as it was blocked when the bed was made. The top left section was the wardrobe area and housed most of our clothes. In the center we had the open area with views out the window . . . . and a record player. Yes it’s probably not the first record player in a van before, but hell we’ve never seen it and thought it was pretty cool! Under that was a little pullout table the was extremely handy for working/eating/playing on. Under that was the undie drawer and, well, that held our underwear lol. The final top section at the back of the van was a multi purpose shelf area that Ellen quickly filled with a tonne of books! In the area underneath that, blocked off by most of the couch, was where we housed our auxiliary battery and electrical components. Every inch of the van needs to be utilised, and putting things like batteries that (hopefully) don’t need to be touched in hard to reach places make the most of the space.

Ugggh we miss this space so much! It was so awesome to be able to rock up to a beach, throw open the back door and blast a record. FYI the vinyl’s were kept in the big square drawer at the bottom. Worked perfectly with the wheel well behind it.
THe Electrical System.
As we said in the bus write up, and probably will in every vehicle conversion blog in future, the electrical system is the most important part of any off grid camper build! While not every system is the same, they all use the same basic components to achieve the goal of charging a battery from the sun and then using that to power the electrical items in the van. If you’re a complete newbie, some basic info on the components is below:
Solar panels - The things that generate electrical power from the sun. Choose monocrystalline panels over polycrystalline for efficiency. Fit as many as you can afford, leaving room for more down the track. You can never have too many panels!
Solar controller - The thing that controls the power generated by the panels. This is essential to ensure you’re safely charging your batteries. Choose MPPT type over PWM for efficiency. Choose a controller that can handle more input than your panels will produce for longevity of the product and the option to add more solar if needed.
Batteries - The thing that stores the power generated by the solar, and then uses that power to run all the 12v ‘loads’ or electrical items. AGM deep cycle batteries are the industry standard these days, if you have the money then Lithium or LiFePO4 batteries are well worth the investment in the long term.
Inverter - The thing that turns the 12v of the batteries into 240v for the use of household items with standard wall plugs. Choose a Pure Sine Wave over Modified for efficiency. Again go larger than the output loads, less stress on components mean they’ll be reliable for years to come.
DC-DC Charger/VSR/Battery Isolator - The thing that charges the battery bank from the vehicles alternator while driving. There’s plenty of options here and most units control both the alternator and solar panel power these days. Free power baby!
Fuses - The things that protect individual components and prevent your home from burning down! Installing the proper fuses in the right place is extremely important for safety. Every component will specify the size and location of the fuses needed, these are a must!
Cut off switches - The things that cut power to specific components. These aren’t a must, but they’re definitely handy for cutting power to or from components if you need to work or replace another part of the system. I usually use them between the solar panels and charge controller, as well as between the battery bank and fuse block for the lights/usb outlets/water pump etc.

Now you hopefully have some basic knowledge of what goes into an off grid electrical system, lets take you through what we put in our little van. With limited money at the time, we went for a small and relatively cheap option that did work well, but due to the inefficiency fridge, wasn’t quite big enough to run everything when the sun disappeared.
To start the set up, we brought a 120ah Amptech AGM Deep Cycle Battery and figured out where we were going to store it in the van. We chose the rear as the pop top roof hinged there and would be the easiest and shortest amount of distance to run the solar cables. Before we set up the solar to charge the battery, we added a basic VSR (voltage sensitive relay) to charge the second battery from the alternator while the van was running. This involved connecting a small ground wire as well as running some thick, heavy duty positive cable from the positive of the main/driving battery into the VSR, then out of the VSR and off to the positive of the auxiliary battery. This cable needs to be chunky to prevent voltage drop over the distance of the wire.
Step two was to start the install of the solar controller. We chose a Renogy Rover 20a MPPT Solar Controller which would do the job nicely and had room for more solar down the track. We mounted this on the wall near our auxiliary battery and started the wiring by running a negative cable from the controller to the second battery. Next was to run a positive cable from the controller, through a 20a fuse, then off to the positive on the auxiliary battery. There is an option to run your 12v devices straight from the load terminals on the controller, but we opted to run these from the battery terminals instead. That’s all for the solar controller for now, need to mount the panel and run it’s wires to finish the setup!
Installing a solar panel is quite straight forward, but it’s always nerve racking putting holes in your roof! Because of our unique ‘wedge’ style pop top roof, the only easy place to mount the panel was at the hinged end at the back of the van. Meaning less cabling and a tidier way of running it into the van. We chose a single 100w monocrystaline panel and also purchased a simple screw down mounting kit, as well as some extremely strong adhesive/sealant to hold the panel to the roof. People have mounted panels with just adhesive successfully, but we wanted to screw the mounts down as well for peace of mind. Better to be safe than sorry! Every solar panel should come with MC4 waterproof connectors on the end of the wires, making it easy to plug in some solar extension cables to get the wires down inside the van (put electrical tape over the exposed ends of the solar wires. Once they’re plugged into the panel they’re live!). We found a rubber grommet inside the back door which we slit to push the cables through, then siliconed up to seal.
With the solar wires run down into the battery area and the rest of the solar components set up, we’re nearly done setting up the charging components of the electrical system! We connected the negative wire from the panel into the charge controller. After that we needed to run the positive from the panel through a cutoff switch (good for shutting the solar off to work on other components), then through a 10a fuse (protects the other components should the panel malfunction), then to the solar controller. The controller came to life and showed the panels generating power and the battery charging. There’s no better feeling than generating free power! Woooo!!!
With the batteries charging properly, we were now ready to use them to power all the 12v accessories (lights/fridge/usb’s/record player/water pump) around the van. Each accessory needs it’s own fuse, so the standard method is to run a positive wire from the battery to a fuse panel, which each accessory then plugs into. We managed to find a switch panel with built in fuses, giving us a fuse panel with the option to turn the accessories on and off all in one. It was a simple matter of running positive and negative wires from the battery to the panel, then running the positive wires from each of the accessories to it’s own switch. What about the negative wires you ask? Well every negative wire from each accessory went to a negative bus bar. This is a common place for all negative wires to ground to, which is then connected to the vehicle chassis via a thick earth wire. With all that set up we had lights, charging for our phones and most importantly, cold beers in the fridge!
The last stage of our electrical system was to install the inverter. This converts the 12v from the battery to 240v and gives us a place to plug in things that need a regular house socket to run - laptops/battery chargers etc. This was a breeze to install after everything we’d just gone through! We brought a small 200w Pure Sine Wave Inverter that simply clipped onto the battery terminals, and that was that! This small inverter was fine for charging small devices, but would be way too small to run blenders, vacuums and other high powered appliances.
Phew! There you have it! A complete electrical setup for a small off grid camper! Everything we installed is basically the bare minimum in terms of power. As we mentioned earlier our fridge was terribly inefficient (was half the price but used 3x as much power as the fridge we should have used) and drained the battery too much after a few cloudy days. If you’d like a hand choosing your set up or need to ask a question, check out here and give us a message!

The Couch/bed.
Here we are at the final big job for the van! Time to crack into a comfy place to sit and sleep. We started with framing out the L shape using some strong 2x4 timber. We already had a steel frame for seatbelts bolted the the wall and floor, so this gave us a good base to build off and secure to. With the frame made, we cut some ply to shape for the top, drilled out some ventilation holes with a hole saw, sanded it, and screwed it to the top of the frame. We now needed a way to fill the empty space and have a solid base for the bed mode. There’s a heap of ways to do this - slatted slide out, backrests that slot down into place etc.
We chose to have ours simply fold/flip over for the cost and ease of building. Cutting another sheet of ply to fill the empty section, we sat it on top of the couch and hinged the outer edge. It could then flip over and fill in the space needed for sleeping! But how to support it? After a long time sitting and staring, the thought of having a backrest that was also the legs came to mind. We made a simple slanted backrest, flipped the base board over so it was sitting flat on top of the couch, and screwed the backrest into the board. Flipping the the board over revealed the problem of the backrest hitting the cupboards on the opposite side, but we could see the idea would work! Unscrewing the backrest from the base and adding hinges meant it could fold out of the way to clear the cupboards. Problem solved!
Finishing up the couch with some old pallet timber to box it in, we cut a couple of doors and hinged them to access underneath. In the very end of the couch by the sliding door entrance, we made a huge drawer that would be our pantry. It was the perfect spot to access when cooking or just chilling in bed! The very back of the couch in the rear door of the van was our garage area. We made a simple flip up door out of pallet wood, and used this area to store chairs, tools, boots and hiking bags.

Wishing we took more/better photos during the build right now! First pic gives an idea of how the bed works. Having the rear cover fold up worked well, but we much prefer how we did it in our next build.
The Ending.
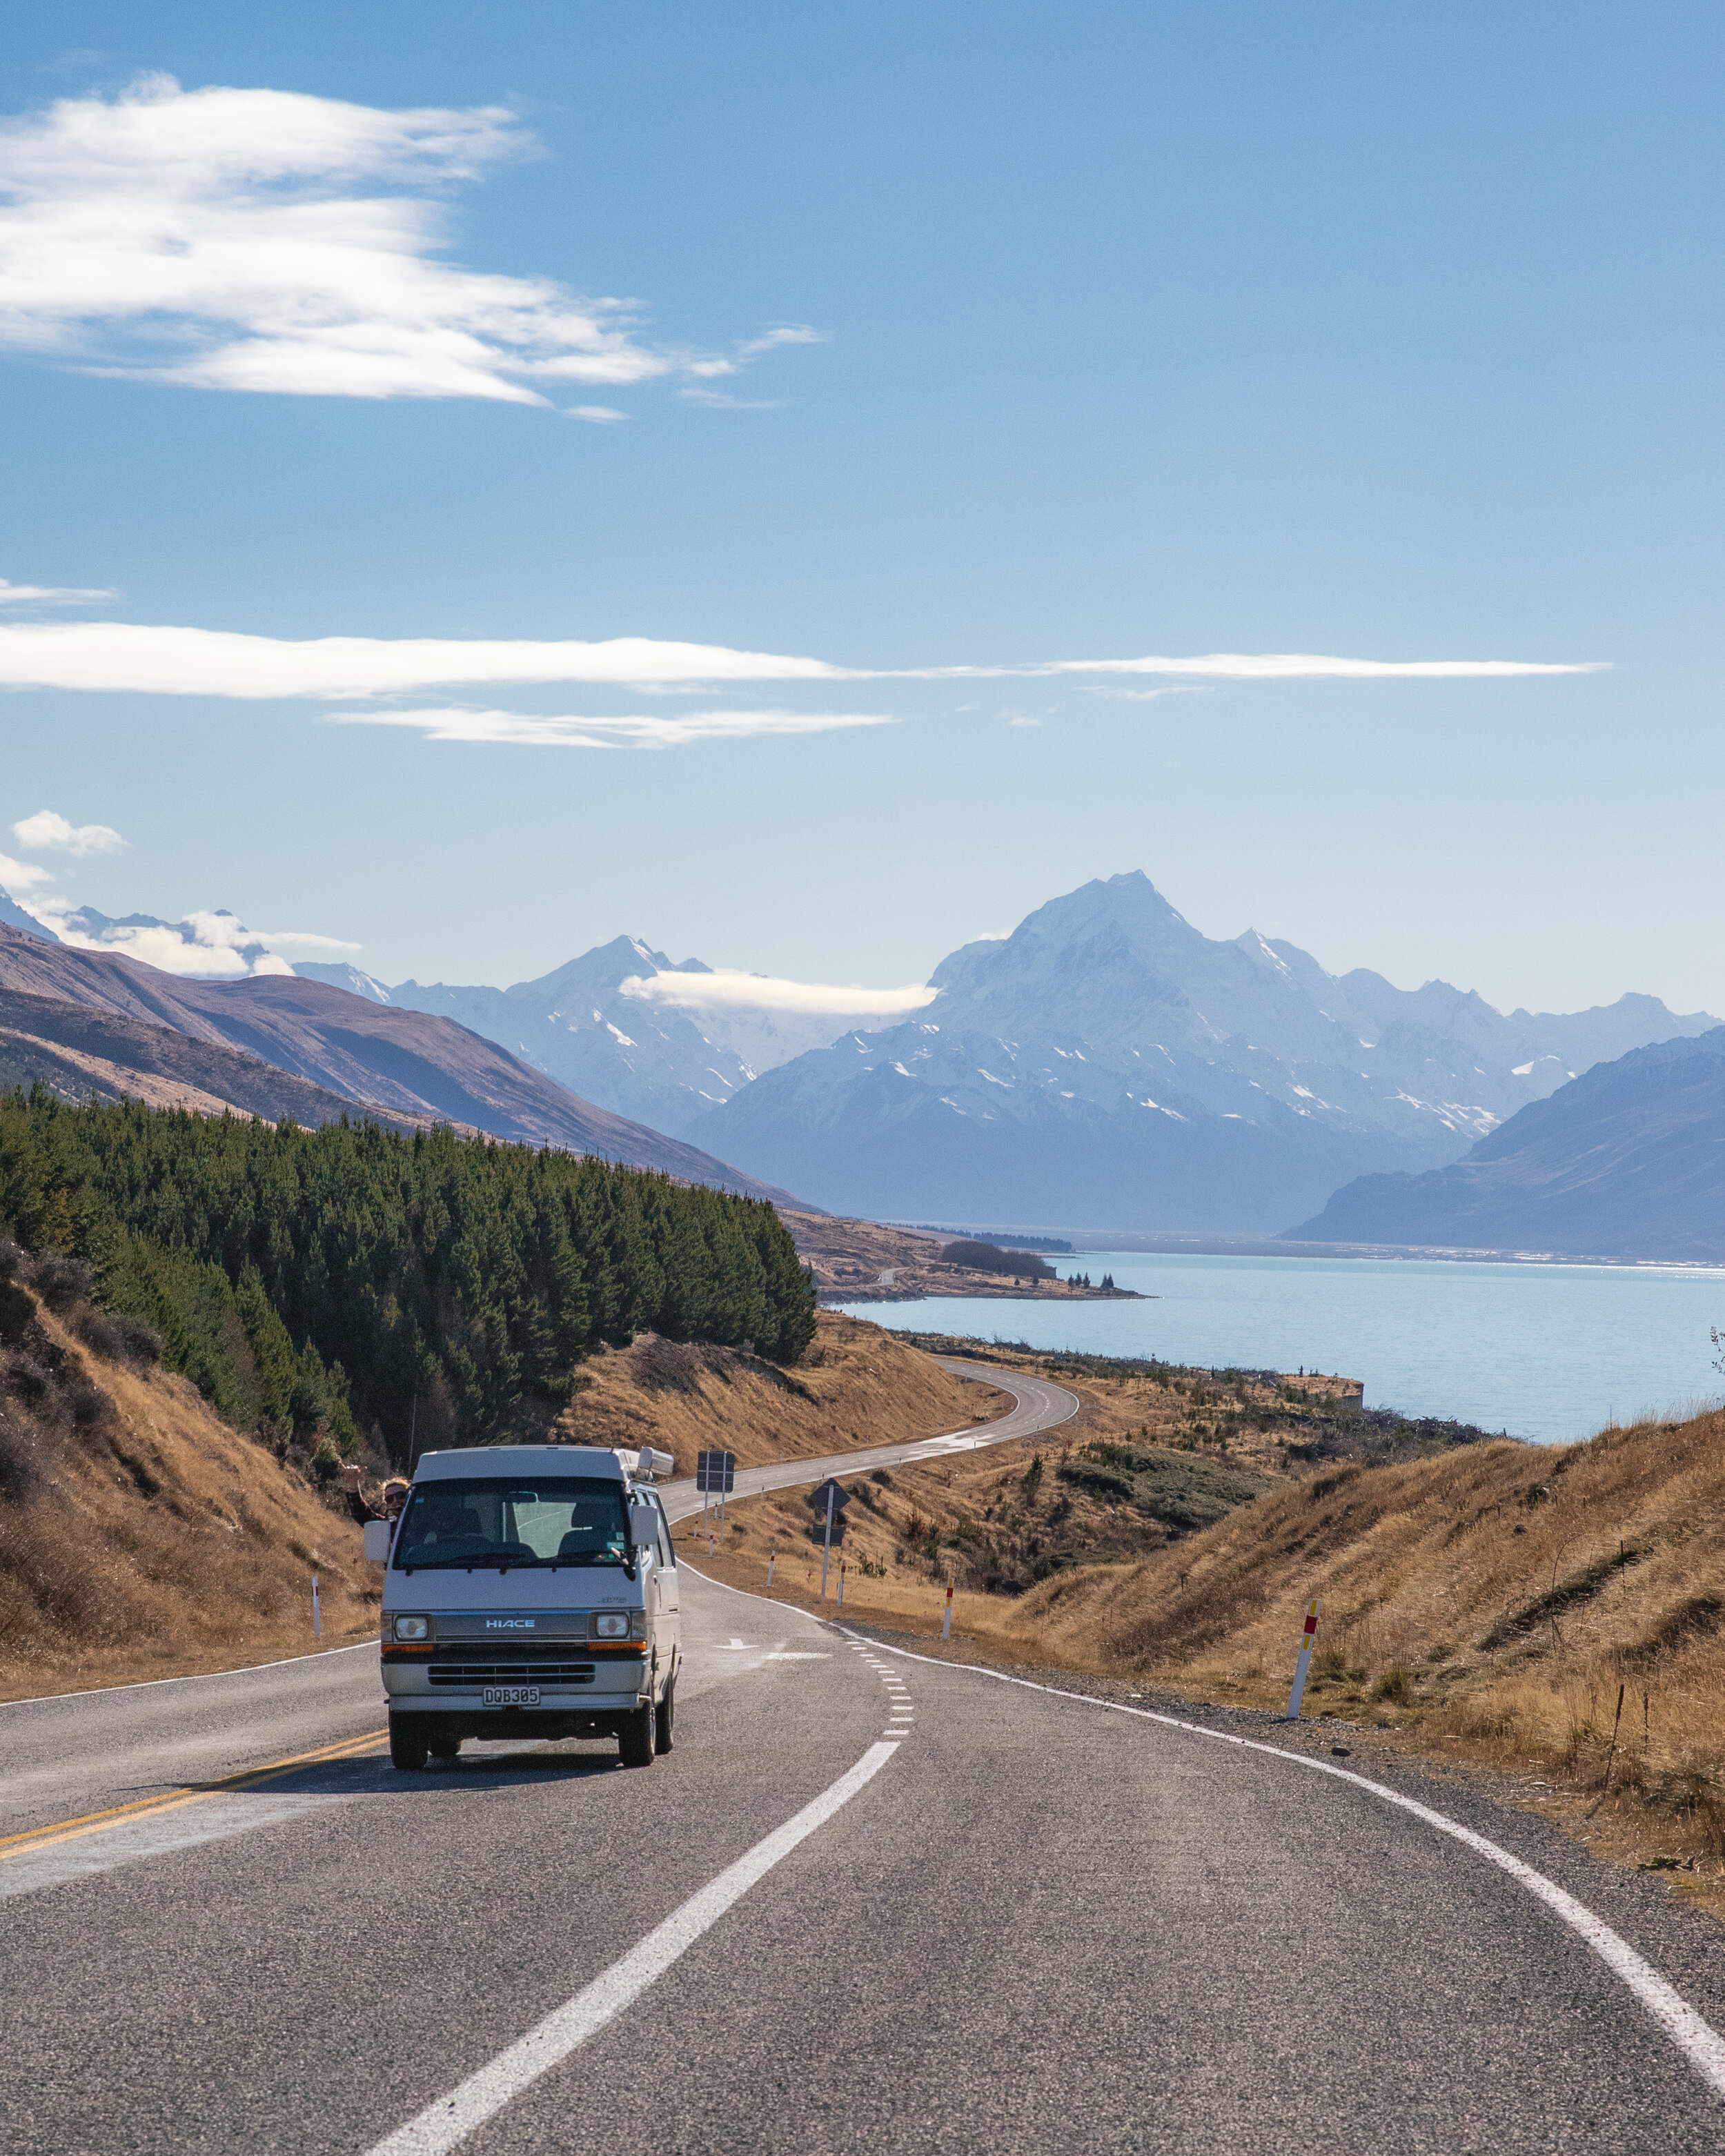
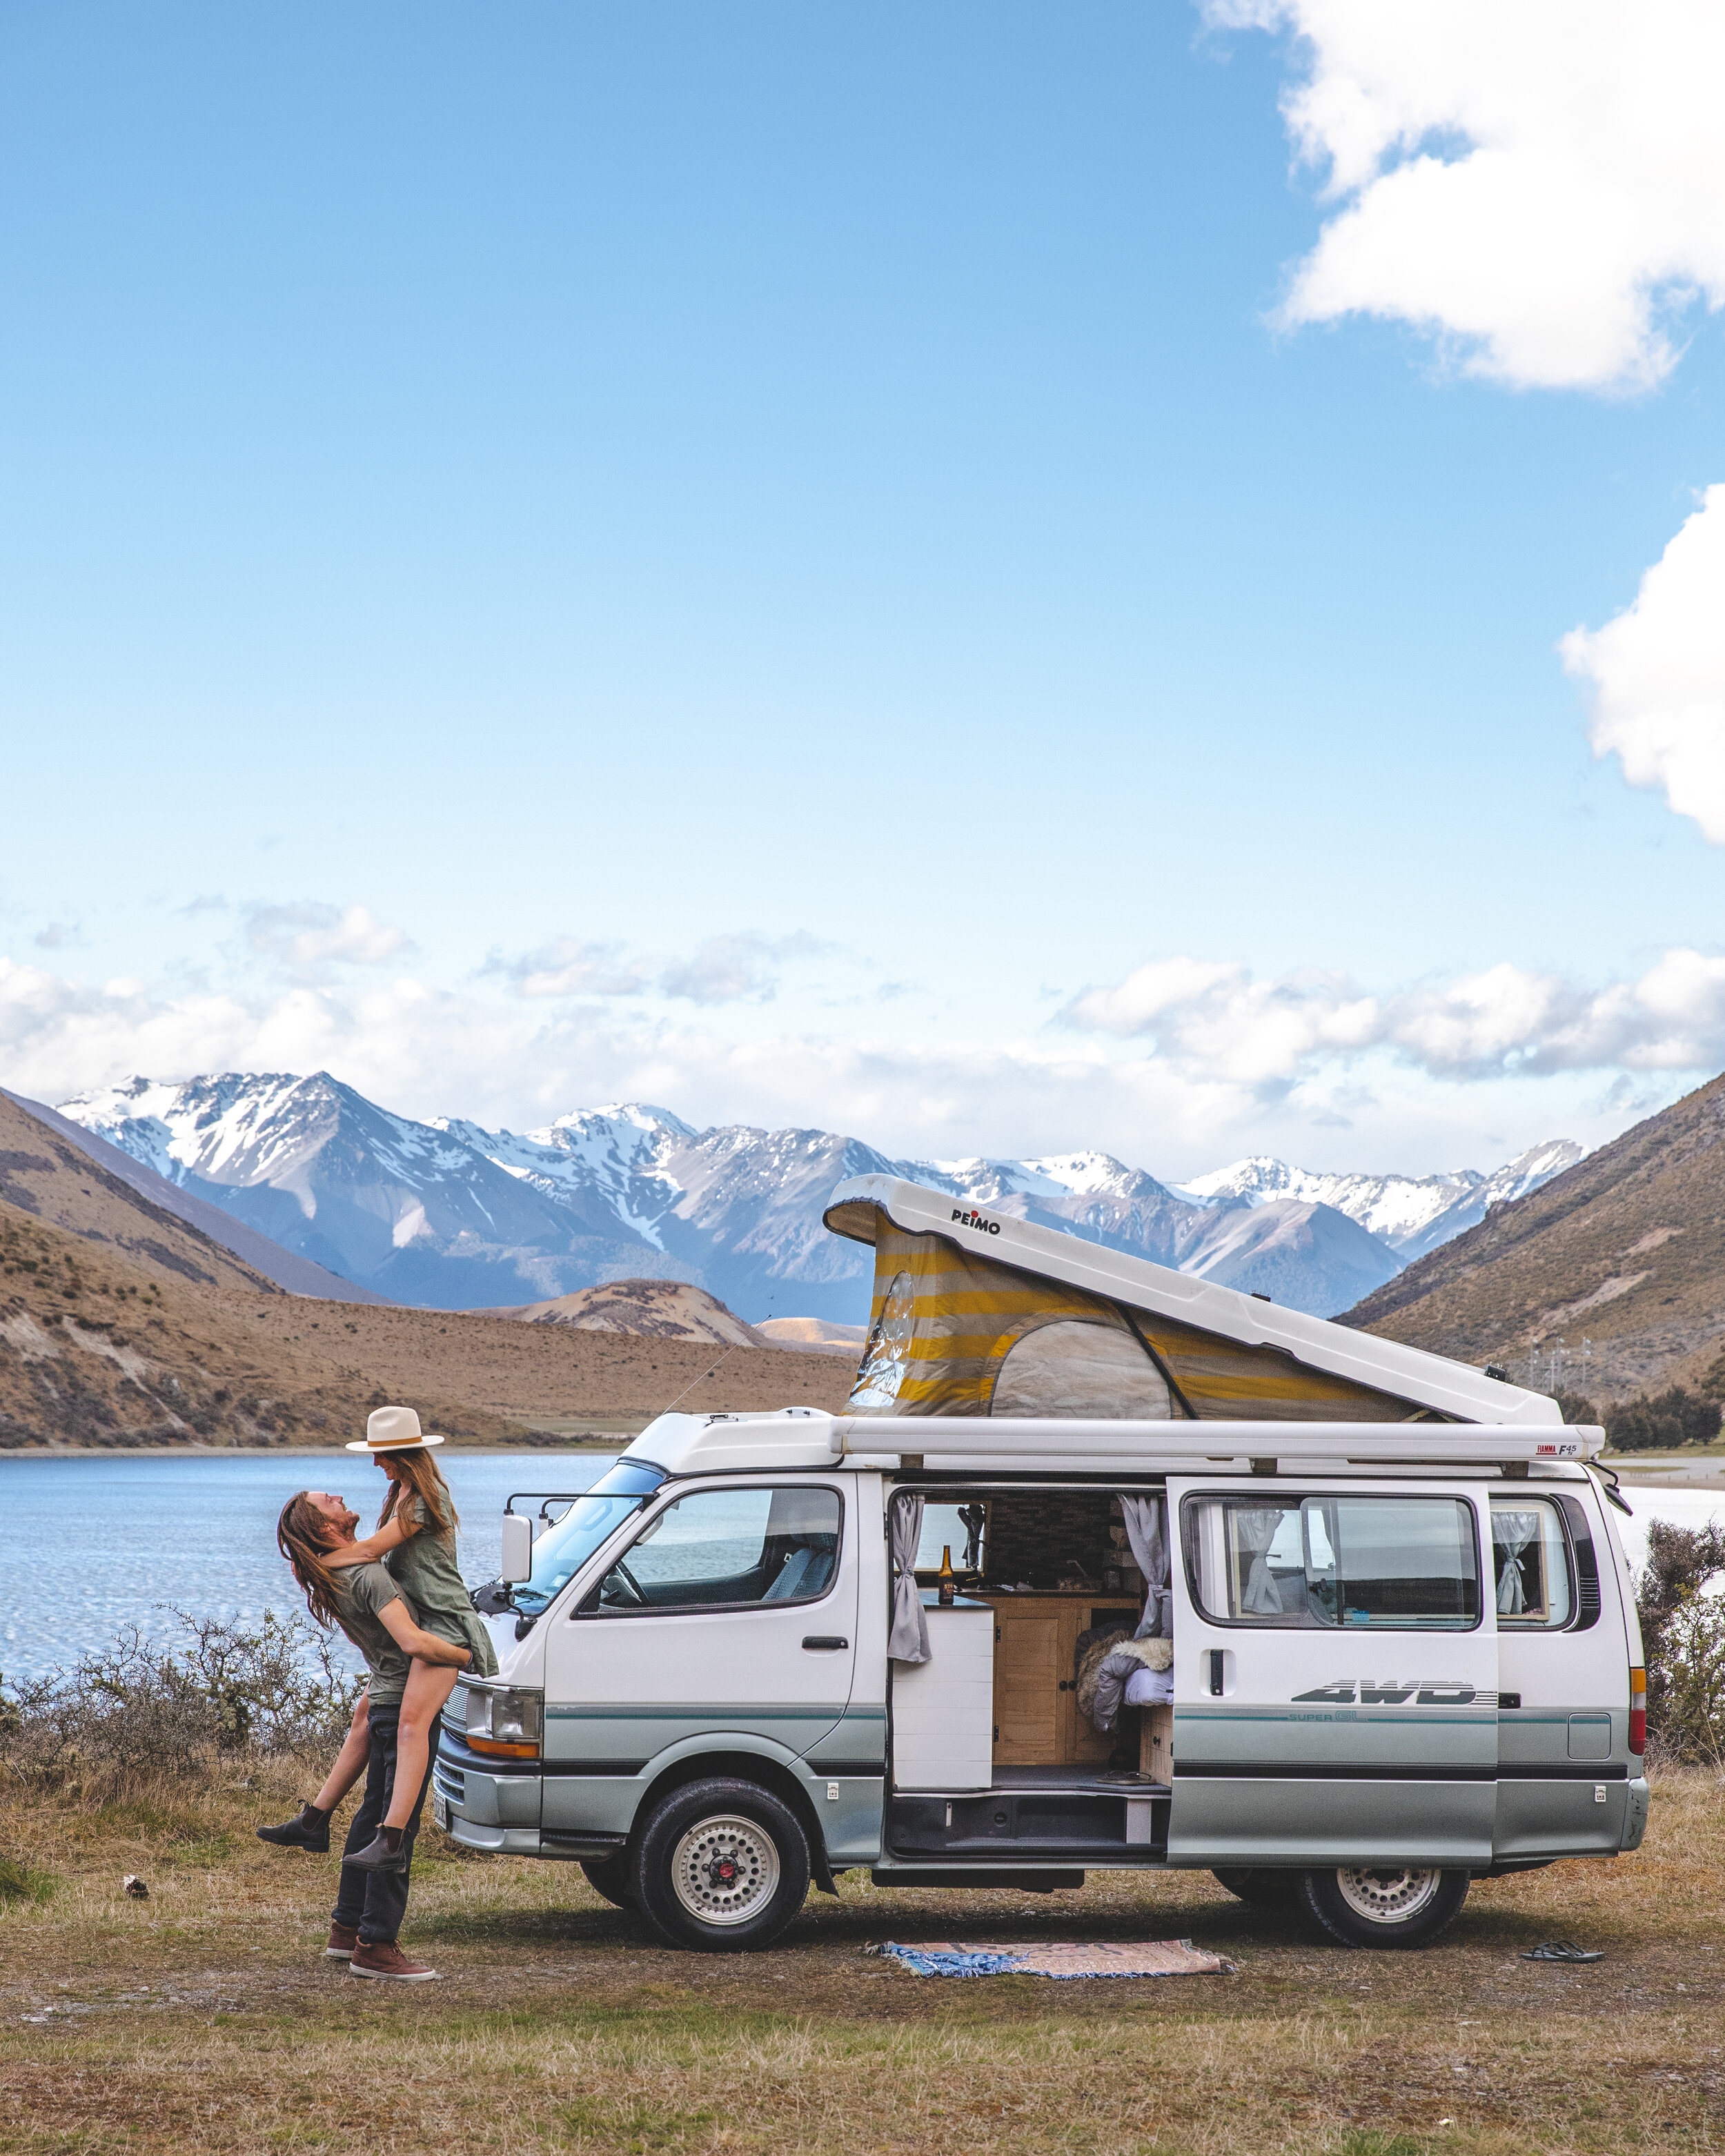
Well. Where do we start?. We put a lot and time and thought into Larry and feel like we created close to a perfect build (for us at least anyway). We pretty much packed him up the very next day and headed out on the long anticipated journey! This is what we’d been craving since starting the bus build over 2 years prior. Things were great! We travelled the South Island a bit before catching the ferry and taking our first proper look around the North Island. It was an awesome time, the van performed and functioned perfectly. We made some of our best memories on the trip but as the funds started to dwindle, and Covid reared it’s ugly head, we headed south to bunker down with family in Christchurch. After a month and a bit of home lockdown, the announcement was made and the country would be free to travel internally. We were ready.
Hammering along the highway towards Milford Sound - a place we had dreamed of going for a long time - we were in utter bliss. This place usually packed with 2000 visitors a day was completely empty and felt like it was just ours. We spent a couple of days in absolute heaven and were driving out on a high after the experiences we’d just had. That’s when it happened. . . . We’d seen the warnings and were driving slowly to match the dodgey conditions. After passing a higher speed limit sign after going through some roadworks, we were accelerating slightly into a corner when we hit a patch of black ice. As soon as we started sliding it was all over.

Some photo’s from our time in Milford Sound, including the last photo of Larry alive. He left from here heading to Te Anau . . . he never made it.
To avoid aiming off the cliff on the left side of the road, I (Goose) did my best to steer us anywhere away from that. We ended up doing a full 180 degree turn and still with some sideways momentum, dropped both passenger side wheels in a ditch on the side of the the road. That was enough to tip us sideways and land us on our passenger side in the ditch. Fuck. What else can we say? With me hanging in the drivers seat and Ellen lying on her door, we made sure each other were okay, panicked a little (A LOT), and began to think. We unbuckled (I may or may not have landed on Ellen), kicked out the already busted windscreen and scrambled out.
We were understandably shook so everything that happened is a little blurry. We were extremely happy to be okay, but Goose knew straight away the future of Larry wasn’t looking good. Ellen caught a ride and called the roadside assistance team to help out. With a tow truck unavailable till the next morning, we rustled through the chaos in the back to grab our essential/important things. We spent the night in a rundown motel and woke up early (not that we slept) to be at the garage first thing. A 5 hour wait and the tow truck driver casually rocked up to ‘gizza hand’. Our freaking house was lying on it’s side in a ditch in the rain! Cheers for showing up to help mate.

Probably the most emotional collection of photos for us. You can see the corner was in full shade despite it being late afternoon. How’s that mess in the back 😞
Long story short, poor Larry was brought back to the nearest town where we left him and returned to Christchurch. As Goose had first thought, the structural pillars of the van were bent and warped, and Larry was unable to return to the road. He was a total write off. Thankfully we had insurance - although he was way undervalued and we didn’t get what he was worth. We desperately wanted to buy the wreck back and salvage our boy, but after a message from a follower and no word from the insurance company, we were told Larry was at a wreckers in Christchurch, chopped up and ready to be sent overseas. We were absolutely heartbroken. It was a complete kick in the guts to loose our little home and knowing they don’t come along very often didn’t make it any easier.
Defeated and homeless, we went back into a ‘second lockdown’ at Ellen’s parents. It took a little bit to pick us up again but we were feeling better after some time. Did we give up and try something new? Hell no! We went on the hunt for another van to keep the adventure rolling! Check out what we found and what happened over here ✌️
💔 RIP LARRY 💔
Miss you bud.
Learn how to build your own van with Van Life Academy - a course created by multiple vanlifers.
Archive